


First up, I've had these little brass and lucite lamps for a long time now. They are sort of a little too...fancy for my taste, but I liked the scale in the room.

 I wanted the shades to have a little color and texture so I ordered some grasscloth wallpaper samples to use for covering the lamp shades. But, thankfully, the order got messed up, and I was able to find this grasscloth for $3/yd at a fabric store in Philadelphia (BTW, if you live anywhere near Philly, please go check out Fabric Row! It's one amazing fabric store after another, with great deals to be had.)
{And yes, that is my big baby belly popping into the shot! Whoops.}
This was a really simple project. I just cut a strip of the grasscloth long enough to wrap around the entire shade. Then I used my trusty fabritac glue to attach the grasscloth, one side at a time, pressing and smoothing all the while.


Once all the side were covered, I trimmed the grasscloth down all the way to the edge of the shade.

Then I glued pale aqua cotton twill tape trim (also from the fabric store) very carefully around the outside perimeter of the shade first. Make sure your lines are straight and uniform here.

After some drying time, I carefully glued and folded down the edges.
Pretty, right? I think black trim would have been very pretty next to the grasscloth, but I felt like I needed the aqua with my orange shelves...
Speaking of the orange shelves...

These ugly shelves were freebies. To freshen up the brass rails on the side, I VERY lightly sprayed the metal with some Krylon gold metallic spray paint. Then I wiped down the shelves really well for a super clean surface for the contact paper to adhere to.

I randomly found about 3/4 of a roll of this croc contact paper on eBay. It is pretty expensive if you buy it new, but the rolls are HUGE and you could easily put up the remnants of the roll on eBay after you finish, like my seller did. Or split the roll with a friend.
{PS if you're looking for snakeskin, zebra or leopard contact paper, check out this much cheaper site}
This project couldn't have been easier - just trim to size, peel and stick!

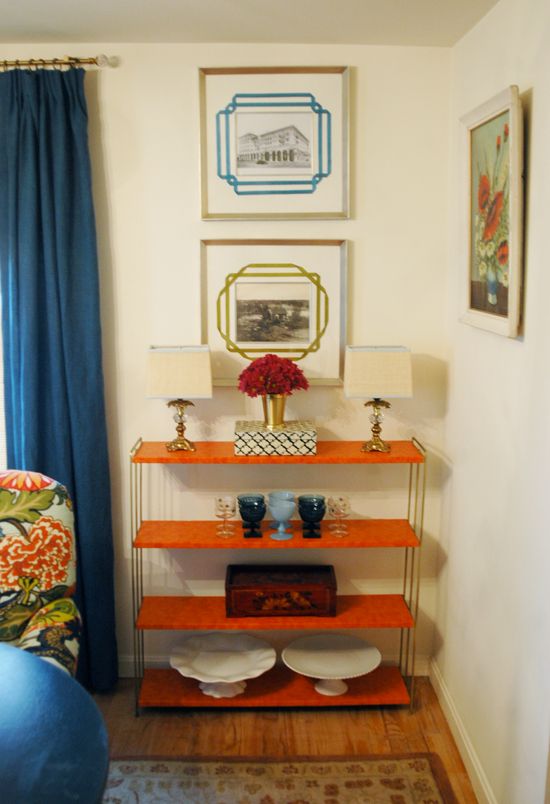
I think it's a fun pop of color and texture. The shelves still need some better styling, but I like the piece a lot.

The directions in the book (pg. 183 - can't find them online) aren't very specific. And there aren't templates for the patterns in the back of the book, so I was a little nervous about doing the pattern myself.

But it was actually pretty easy to just eyeball the design. The basic idea is to use bias tape trim to make a pretty border for picture mats. All you really need is a ruler, pencil, glue and a paint brush. And the bias tape, of course, which is available at fabric stores. Martha also carries a couple of colors in her ribbon line for Michaels, though you pay a premium for those! My trim was $0.30 a yard on Fabric Row.
I used a great paper glue called Zip Dry. It dries perfectly clear and if you mess up and go outside the lines, it rubs off sort of like rubber cement. Make sure to apply with a brush for a thin and flat application. And work in small sections because the glue dries pretty fast, as the name suggests.
Again, the basic idea is to draw a few straight lines with a pencil to act as a guide as you glue and smooth down the bias tape. The only sort of tricky part is the folding on the corners, but that got much easier after a few tries.
Here's the finished result. I decided to use a peacock blue and a chartreuse green and I love the contrast.
I was able to put together this entire wall (lampshades, orange shelves and trimmed out frames) in an afternoon. So please don't let my long and probably confusing instructions stop you from trying these projects!! They really are easy, I promise.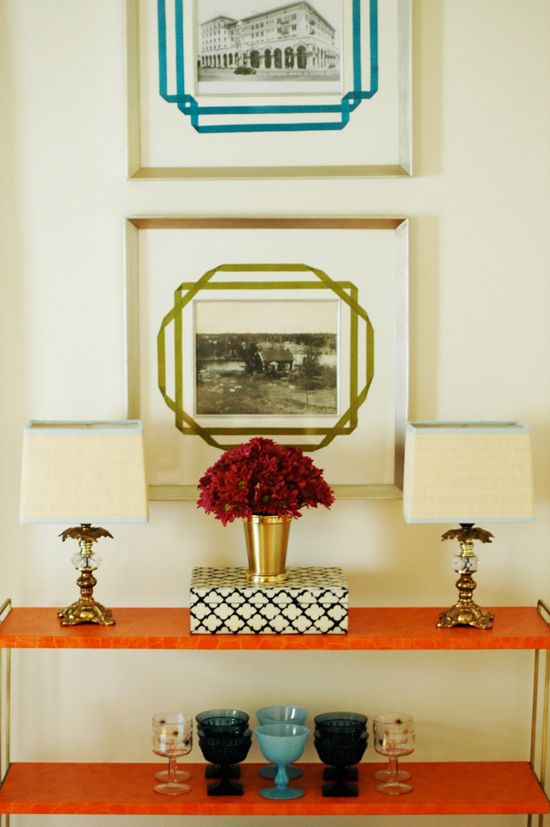
Come back for a few more projects on Monday. Have a GREAT weekend! Happy Halloween!


No comments:
Post a Comment